Showing posts with label Free Pattern. Show all posts

Friday, December 4, 2020

Fingerless Gloves - Free Pattern and Fun and Easy Crochet Tutorial


J/6.00  mm Crochet Hook
3.5oz of Bulky Yarn
Scissors
Yarn Needle

Gauge: 4" x 4" Square is 12 stitches wide and 7 1/2 rows tall.

Glove Uncuffed is 10" long and 4" wide

Note:At the end of each row "chain one loosely and turn" is implied unless told otherwise.

This is for a medium set of gloves. If you want larger then add an additional 2 rows of HDC. I had enough yarn leftover from the 3.5 oz to do this so you should not need to buy more.

Create the Body of your Gloves

Chain 27,
Row 1 HDC in third chain from the hook. HDC in each stitch across (25)
Row 2-15 HDC in each stitch across (25)
Turn your work and single crochet one time into the side of each row (15-19), 

Sew up the sides of your gloves


Fold your work in half, right sides together. 
"Sew" them together with a single crochet in the first 5 stitches. 


(what we do next with form the thumb hole)
Single Crochet in the next five stitches on only one side of the glove (not sewing the two layers together. 
Then proceed to sew the glove together with single crochet stitches in the last 15 stitches
Fasten off. 
Turn the glove right side out. Make a two inch cuff on the bottom of the glove and enjoy!


Repeat the pattern for a second glove.

Let me know if you have any questions?

These are very versatile. They can be adorned with bows, buttons, ribbons...the possibilities are endless. Tag me on social media so that I can see them if you make them.

Thank you for joining me and I hope that you stay warm and joyful. 

Melody

Monday, July 23, 2018

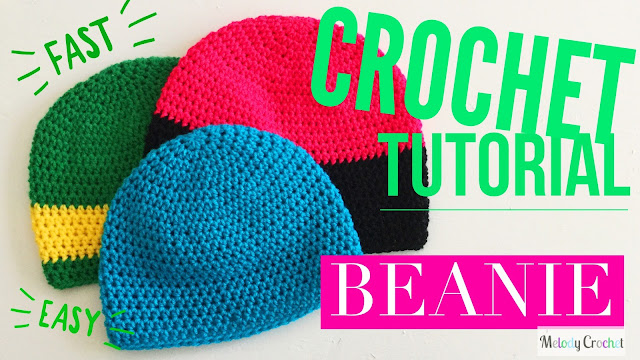
HDC Beanie Crochet Pattern


How to Make the Half Double Crochet Beanie!

I have made 1000's of these. Thousands!

This is a fast and easy pattern that you can literally dress up in any way! You can make this into a character, you can make this frilly, add a button or an applique. Or just wear it plain and keep warm! It's so versatile.

The pattern has a Small, Medium and Large Adult size included.

Materials:
1 Skein Size 4 Worsted or Aran Weight Yarn (Red Heart Super Saver or Vanna's Choice work well!)
1 Size I/9 5.5mm Crochet Hook
1 Yarn Needle
1 Scissors

The Free Printable PDF Pattern can be found by clicking here!

If you do not want to download anything then just keep scrolling down for the pattern. I understand that!

I also made you a Video Tutorial! I hope you enjoy the company while you crochet like I do!


HDC Beanie


By MelodyCrochet copywritten 2015 - Enjoy! (and by enjoy I mean share on social media and tag me because
I love to see what you guys make!!)


This is the base for so many of my character hats. If you are using it for a plain hat use something soft and
plush...if you are making a character hat I highly suggest Red Heart Super Saver! It is just so much better
when you sew things on it and attach anything with glue.

Stitch Legend
Ch - Chain
SC - Single Crochet
HDC -  Half Double Crochet
FO - Fasten Off
MC - Magic Circle
IncHDC - Increase Half Double Crochet
Materials
5oz Size 4 Worsted Weight/Aran Yarn
I Hook/Size 5.5mm
Yarn Needle to weave in Ends
Scissors


Notes


Small:  18” around and 8” Deep
Medium: 21” around and 9” Deep
Large: 23” around and 10” Deep


Pattern


All Sizes
Row 1) 9HDC in a magic circle (9), SS into the first HDC of the row and ch 2
Row 2) IncHDC into each stitch across (18), SS into the first HDC of the row and ch 2
Row 3) HDC, IncHDC across (27), SS into the first HDC of the row and ch 2
Row 4) HDC, HDC, IncHDC (36), SS into the first HDC of the row and ch 2
Row 5) HDC around (36), SS into the first HDC of the row and ch 2
Row 6) HDC, HDC, HDC, IncHDC (45), SS into the first HDC of the row and ch 2
Row 7) 4 HDC, IncHDC (54), SS into the first HDC of the row and ch 2
Row 8) HDC Around (54)
Size Small Stop and continue at Row “Small Row 12”


Row 9) 5 HDC, IncHDC (63), SS into the first HDC of the row and ch 2
Row 10) HDC Around (63)
Size Medium Stop and continue to Row “Medium Row 12”


Row 11) 6 HDC, IncHDC (72)
Size Large Continue on to Row “Large Row 12”


Small Row 12-20) HDC Around, SS into the first HDC of the row and ch 2 (54)
Medium Row 12-22) HDC Around, SS into the first HDC of the row and ch 2 (63)
Large Row 12-24) HDC Around, SS into the first HDC of the row and ch 2 (72)


After you have finished all of your rows for your hat size:


Last Row) Ch 1 and SC at the base of Ch 1 and across, SS into the first stitch of the row and FO. Weave in ends.


Thursday, June 14, 2018

Caterpillar Baby Cocoon Set with Video Tutorial


Crochet This Caterpiller Baby Cocoon and Hat set with me! This is sized for a newborn and perfect for newborn photography. Feel free to go up or down one hook size to accommodate if a bigger or smaller baby is expected.


The Materials Needed:


You will need red, yellow, brown and three shades of green yarn in a size 4 worsted weight acrylic. Here is the yarn I used:

One Skein Each:
Red Heart Super Saver CHERRY (Red)
Red Heart Super Saver SPRING (Medium Green)
Red Heart Super Saver PADDY (Dark Green)
Red Heart Super Saver HONEY DEW (Light Green)

Small Amount of:
Red Heart Super Saver LEMON (Yellow)
Red Heart Super Saver COFFEE (Brown)

I Hook
F Hook 
My Yarn Scissors
Yarn Needles


This description includes affiliate links and I might get financial compensation if you choose to click them. I appreciate your support SO much. Thank you! (((hugs)))

Friday, May 11, 2018

Succulent Pot Baby Cocoon


Ohhh its baby season again! They are everywhere. Absolutely adorable. You know what else is everywhere? Succulents. Succulents and Cacti as far as the eye can see in art, stickers, slippers...you name it. But, not newborn photography. Until now. Here is my contribution to the cactus madness. My succulent baby cocoon. It's an interesting crochet that won't take you too long. And the finish project will make any new parent smile. So, grab a hook and lets play!

Here is what you will need:
Size H/5mm Crochet Hook
2 Colors of Size 4/Medium Weight Yarn.
Examples: Red Heart Super Saver in Redwood and Red Heart With Love Minty
Scissors
Yarn Needle
Measuring Tape

And here is a link to the free PDF

As always if you see something on my blog that you like and you do not want to make it yourself then feel free to contact me for a custom order on Etsy. Be sure to use the hashtag #succulentbabycocoon if you post pictures of your make.

Take care and see you next time!
Melody

Here is the Video Tutorial!


This post contains affiliate links and if you click them I might be compensated financially. Thank you SO much for your support. It really means the world to me. 


Thursday, December 8, 2016

Bun Hat - a free pattern


Messy Bun Hat

There are a ton of bun hat patterns popping up everywhere. But they were lacking a little something for me. I went ahead and took the inspiration and made it my own.

I used Unforgettable Yarn from Red Heart 70 grams/200 yards total. That it is less than one ball but this hat is worked holding two strands together. I was making more than one hat (of course!) so I just held two strands together from separate balls of the yarn. If you are just making one hat I would divide the yarn prior to starting your hat...this is not a great hat to work from both ends of the ball on, in my opinion.

Surprisingly, since I worked from the outside of both balls the yarn colors changed in the same way at the same time so you can hardly even tell I held two strands together when looking at my hat. Next time I will be making one where I start on different colors. I love my Tealberry colorway and would love to see those colors play together even more.

I work in rounds for the body of this hat. I do not slip stitch, chain 2. I just work in a spiral all the way up. The decreases I make are taken at the seam in back. To make this easy to see I put a locking stitch marker so that I have a mental reminder of where the back seam is.

So here is what I used!

1 ball of Unforgettable Red Heart Yarn separated into two balls.
I hook
H hook
Locking Stitch marker 
Yarn Needle to weave in the ends

I used these stitches and abbreviations!

sc - single crochet
sc blo - single crochet through the back loops only (when looking at the top v that a stitch makes, you are working only in the branch that is farther away from you.
hdc - half double crochet
dec hdc - decrease half double crochet
yo, insert into next stitch, yo, pull back, yo insert into the second stitch, yo, pull back, yo and pull through all of the loops on the hook.

And here is what I did!

We will start by making a long strip of sc in the back post only that will fit around your head. It will be 70 rows of 8 single crochets.


With your I Hook while holding 2 strands of yarn together chain 9, turn
sc in the second chain from the hook and across (8sc)
*ch 1, turn, sc in each stitch across (8sc) in BACK LOOPS ONLY*
repeat * to * 68 times. Do not Fasten Off.

This ribbed band of 70 rows should fit nicely around the head of most teens and women. Its stretchy!

When your band is complete place fold in half lengthwise (like in the picture above) with right sides facing and single crochet these together to form a loop. This is your hat band and will look much neater in a color changing yarn that it would if you used a Back Post/Front Post Double Crochet. I make alot of baby hats this way too because they grow so quickly. This stretchy band makes it so they can wear the hat longer.

Now to make the body of your hat!

Continuing with the same I hook and the same yarn strand (still held double) that you had not fastened off after seaming up the band.

1) chain 2 and HDC in each stitch along the side of your hat band across (70) place marker as the start of the next row.
2) *hdc across until the last 4 stitches before marker, half double crochet decrease 2 times*
3-7) repeat * to * 5 times. Change to H hook
8-10) repeat * to * 3 times

We have decreased 2 stitches per row for 9 rows now. We are down to 52 stitches and the hat is nearly done. We will now decrease a bit more aggressively so it really hugs the top of your head to show off that messy bun!

11) hdc, dec hdc around to the marker
12) dec hdc around to marker.
13) sc around to marker, slip stitch into the first stitch of the row and FASTEN OFF! *confetti*

Weave in your heads, take a picture, post it to Instagram and tag me (Im MelodyCrochet).

Keep warm guys!

With love,

Melody

There are affiliate links in this pattern. Thank you SO much if you use them. I only link to things that I have used and enjoy.


Wednesday, May 15, 2013

Tricorne Pirate Hat Crochet Pattern


Im taking part in the summer nerd games and this is my first entry. :) Its a pirate tricorne hat like the ones found in Limsa Lominsa in FFXIV


Just a quickie pattern if you want to make one like it! :)

Items You Need
Red Yarn -RHSS
Heather Grey Yarn - RHSS
G Hook
Stitch Marker (I use a little piece of contrasting yarn and just pull it out and replace it at the beginning of each row so I dont lose my place when working in the round)
Yarn Needle
Scissors.


I started in the center of the hat forming the "beanie" of it first. My gauge with Red Heart on a G Hook is 4st x 4st gives me one square inch. The drop on this hat is only 7"...you dont want it to come down to your eye brows before you begin the brim or it will look really odd. So the beanie portion is 22" wide and the drop is 7".

I worked in the round and did NOT slip stitch chain one at the end of each row. I used a stitch marker and just kept working in the circle.

The hat only uses single crochet. When I say "sc inc" it means sc two times in that one stitch. :)

Row 1) 6 sc in a magic loop circle. Cinch your circle closed and continue to row 2 (6)
2) sc increase in each stitch around (12)
3) *sc, sc inc* around (18)
4) *sc 2 times, sc inc* around (24)
5) *sc 3 times, sc inc* around (30)
6) *sc 4 times, sc inc* around (36)
7) sc around (35)
8) *sc 5 times, sc inc* around (42)
9) sc around (42)
10) *sc 6 times, sc inc* around (48)
11) sc around (48)
12) *sc 7 times, sc inc* around (54)
13) sc around (54)
14) *sc 8 times, sc inc* around (60)
15) *sc 9 times, sc inc* around (66)
16) sc around (66)
17) *sc 10 times, sc inc* around (72)
18) sc around (72)
19) *sc 11 times, sc inc* around (78)
20) *sc 12 times, sc inc* around (84)
21) *sc 13 times, sc inc* around (90)
22-26) sc around (90)

That was it for the part that sits on your head...we are now continuing on to the brim. No need to fasten off ...just keep working in the round.

27) *sc 6 times, sc inc* around (102)
28) *sc 7 times, sc inc* around (114)
29) *sc 8 times, sc inc* around (126)
30) *sc 9 times, sc inc* around (138)
31) *sc 10 times, sc inc* around (150)
32) *sc 11 times, sc inc* around (162)
33) *sc 12 times, sc inc* around (174)
34) *sc 13 times, sc inc* around (186)
35) sc around (186) Slip Stitch, Fasten off.

Attach Gray Yarn

36) *sc 14 times, sc inc* around (198)
37) *sc 15 times, sc inc* around (210)
38) sc around (210) Slip Stitch, Fasten off.

I made the end where I fastened off the back of the hat.

Now you have a great big, floppy hat. Turn the hat inside out so that when you fold the edges up in a "tricorne hat shape" the "right side" is facing out on the sides.

Like this...


I figured it is more important that the sides that everyone can see are the right side of the crochet fabric, as opposed to the top of the hat...fewer people will see that.

After flipping it "inside out" just shape it however want it to look. It is about personal preference. I did not want my edges to be too sharply folded. I like the rounded corners. Once you find how you want it to look then just use the complimentary yarn, cut a few strands and sew it to keep it that shape.

Just a Note: When you are sewing the outside just enter a stitch and take the working yarn into a hole that is above and on stitch to the right or left. Just like you are cross-stitching. This will make the stitching nearly impossible to see. I learned this by "accident".

I sewed the red and then I sewed a few strands through the gray also. It curled a bit before I stitched through the gray a few times.

Finished product! :)

Featured Post

Exploring Local Creativity at the Texas State Fair