I have rounded up several crochet patterns to celebrate and show off your Canadian pride to your friends and family (even if it is just on social media this year!). I love to celebrate along with you here in Texas. I always make a little project to we have poutine. To keep my family excited about the holiday poutine only happens on July 1 in my house. My family devours it...I have to make two trays at this point if I want any.
So, celebrate along with and show the Canadians some love!
Click the pictures to be taken to the pattern homes!
The potholder is amazing...but this blog has a bunch of Canadian inspired crochet projects. Bags, hats...you name it. Rich Textures Crochet has it all!
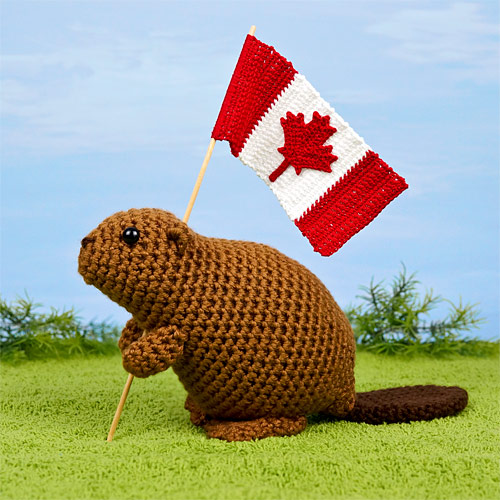
This beaver with the flag is amazing!
This hat is adorable! I think I need one.
How incredible is this corner to corner Flag Blanket!?
I am loving the maple leaf garland! So beautiful! Decorate your mantle, your car, your cubicle....your best friend.
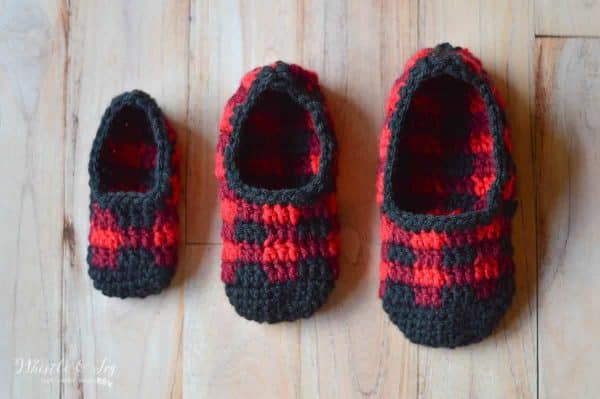
These plaid are so low-key Canadian that you could just wear them right on into fall. I love buffalo check in red or white.
But, whatever you do make sure you have a wonderful day and maybe...just maybe...Poutine.
Leave a 4”+ Tail in your Magic Circle to weave in and secure afterward.
Do not fasten off before beginning brim. The separation of sections is just in case you made more or less than 17 rows when creating your choice of length.
In the video I move seamlessly from the 3 *SCDec + 1 BLSC* at the end of row three into the 2 *SCDec + 1 BLSC* at the begining of row 4. That is why I say to do it FIVE times. Please, forgive any confusion.
Start with a Magic Circle (or chain 4 and slip stitch)
Row 1, ch2, 12 DC into MC over tail. SS (12)
Row 2: ch2, IncDC into each stitch around. SS. (24)
Row 3: ch2, *1 DC + Inc DC* around. SS. (36)
Row 4: ch2, *2 DC + IncDC* around. SS. (48)
Row 5: ch2, DC around (48)
Row 6: ch2, *3 DC + IncDC* around. SS. (60)
Row 7: ch2, *4 DC + IncDC* around. SS. (72)
Row 8-17+: ch2, DC across. SS. (72)
Begin Brim
Row 1: ch1, SC around. (Do not SS or ch...we are working in a spiral).
Hi Friends!
I just finished recording the video for my Mary Jane Crochet Slippers. This pattern is so easy and so fast. I have been making these for the last few weeks. I cannot seem to stop collecting Bernat Blanket Yarn ever since I designed these. I hope you like them as much as I do! The free printable and downloadable PDF Or keep scrolling if you would like to read it from the blog. The Video:
The written pattern:
Mary Jane Slippers
Finished Size: Women's Medium-Large. Size 7-10. They are very adaptable but if you need more or less length just keep crocheting the back of the slipper or stop early.
Materials
One Ball Bernat Baby Blanket. I get the 300-gram ball to make 3 pair, but the small-sized ball will give you one pair of slippers
I designed a new bag after seeing the new chenille yarn arriving at Michaels and Hobby Lobby. Its soft, smooth and bulky weight so it works up fast. It slips across a hook in the most satisfying way. I just cannot get enough projects in mind for what to do with it all. I love this gray color...I used Vapor Gray in the Bernat Velvet yarn. This entire bag also took just one ball of the yarn...always a plus in my book. I hope that you enjoy and thanks for stopping by!
By MelodyCrochet copywritten 2018 - Enjoy! (and by enjoy I mean share on social media and tag me because I love to see what you guys make!!). Feel free to sell what you make. Please, do not sell or alter my actual pattern as your own. Linking and sharing to my blog is ALWAYS appreciated. Happy making and Thank you for coming. I really do appreciate it!
Finished Size: 17 ½ “ tall x 15” wide. (44cm x 38cm) Lots of negative ease since its stretchy.
Stitch Legend
Ch - Chain
SS- Slip Stitch
SC - Single Crochet
DC - Double Crochet
FPDC - Front Post Double Crochet
BPDC - Back Post Double Crochet
FO - Fasten Off
IncSC - Increase Single Crochet (two Single Crochet in the same stitch)
DecSC - Decrease Single Crochet (Insert into next stitch, draw up a loop, insert into the following stitch, draw up a loop, yarn over and pull through all three loops on your hook)
4 Stitch Markers (Or pieces of yarn to mark a stitch for increase/decrease stitches)
Yarn Needle To weave in bulky size ends. I LOVE these for bulky yarn.
Notes
There is a video of how to make this bag here.
This is a bottom-up construction. We will be working in the round but not in a spiral. At the begining of each double crochet row, I will say “chain two”. If you feel more comfortable chaining 3 please do. But, I find that I get added (undesirable) bulk in my seam from doing so. I suggest using a K hook for chain stitches if you are using a chenille style yarn because they tend to have a lot of stretch and the chains work out too tightly and might pucker the edge of your work.
Ch2 at beginning of rows counts as the first DC. The next DC should not be at the base of this chain. Place it above the following stitch or your waffle pattern will spiral.
Feel free to contact me with any questions. Thanks!!
Pattern
Chain 37 on the larger (Size K) crochet hook. Remove your hook and replace with the smaller (Size I) hook for the rest of the pattern.
1
SC in 2nd Ch from hook and across until the second to the last Ch of row (35 SC), in last Ch of row SC 3 times and PM in the 2nd of these SC. Pivot work so that you can crochet along the opposite side of your Ch. SC into the next 35 Ch and in the last Ch SC 2 times, PM in the 2nd of these SC. Slip Stich. (Do Not turn) (72)
2-4
Ch1. SC in the base of Ch1 and across, IncSC in each marked stitches. Move the marker to the 2nd St of each new increase, SS. (Row 2 - 74) (Row 3 - 76) (Row 4 - 78)
5
(Setup Row) Ch2. (counts as first DC here and throughout pattern) DC in next st and across. SS into the 2nd Ch of Ch 2 at beginning of this row (78)
6
(Waffle Pattern Row 1) Ch2, DC, DC, *FPDC, DC, DC* Repeat * to * to the end of the row, SS into the 2nd Ch of Ch 2 at beginning of this row (78)
7
(Waffle Pattern Row 2) Ch2, BPDC, BPDC *DC, BPDC, BPDC* Repeat * to * to end of row. SS into the 2nd Ch of Ch 2 at beginning of this row (78)
8-27
Repeat Row 6 and 7 ten more times
28-30
Ch 1. SC at the base of chain and across, SS into the top of first SC (78 SC in each row - Ch 1 not counting)
Instr.
Fasten Off. Lay bag flat. From each side count in and PM 9th stitch. Flip bag and repeat.
So you will have 16 unmarked stitches on each side, then the 4 marked. And front and back center will each have 21 unmarked stitches.
31
(All chaining go to K hook...then back to I hook for the SC stitches). Attach yarn with a slipknot in any of the unmarked side stitches.
Ch1 and SC in the base of Ch and across to stitch before the 1st marker you encounter
Ch 35 and skip the stitches between the 1st and 2nd markers (23 stitches skipped)
SC into stitch after the 2nd marker and SC across to stitch before 3rd marker (16)
Ch 35 and skip the stitches between 3rd and 4th markers (23 stitches skipped)
Sc into stitch after 4th marker and across to the end of row.
SS into the top of first SC of row. (32 sc are body stitches + 70 Ch are handle stitches)
32
Ch1 and SC in the base of Ch and in each stitch around. (102 sc) PM in the 10th and 25th SC in the Ch stitches (handles...you will be IncSC in these markers).
33
Ch1 and SC in the base of Ch and to the stitch before the handle, *DecSC last body stitch and first handle stitch), SC 8, IncSC in marked stitch (replace marker into the 2nd SC of this IncSC), SC 15, IncSC in marked stitch (replace marker into 1st SC of this IncSC), SC 8, DecSc* SC 16, *repeat * to * SC to end of row, SS into first SC. (102)
34
Repeat row 33, Fasten off.
By MelodyCrochet copywritten 2018 - Enjoy! (and by enjoy I mean share on social media and tag me because I love to see what you guys make!!). Feel free to sell what you make. Please, do not sell or alter my actual pattern as your own. Linking and sharing to my blog is ALWAYS appreciated. Happy making and Thank you for coming. I really do appreciate it!
I am an Amazon affiliate. This post contains links and if you click on them I may be compensated. Thank you in advance!