Thursday, July 26, 2012

Crocheting a Basket and Dog Grooming

Today I was straightening up and decided that I wanted to keep all of Pickles grooming products in to make her morning groom more convenient. 


So I made something that I have made many, many times...a crocheted basket!


I like to keep them simple and just play with colors. This one had to have some purple because it will be located in my very purple kitchen.

I make my baskets by holding two strands together and using a N hook. Its big and they work up fast! I like using Red Heart Super Saver. It holds its shape well and the colors stay bright wash after wash.

I made the bottom black (holding two strands of black together) I formed a circle by working in a spiral. At the end of each row I did not chain or slip stitch...I just went right to the top of the next stitch and kept going.


Form the Base: 

In a Magic Circle I worked 9 HDC, cinched it closed. (9) If you don't want to pay attention to your counting, insert a contrasting strand of yarn to mark your stitch.
Row 2: Two HDC in each stitch (18)
Row 3: HDC around, increasing every other stitch (27)
Row 4: HDC around, increasing every 3rd stitch (36)
Row 5: HDC around, increasing every 4th stitch (45)
Row 6: HDC around, increasing every 5th stitch (54)

This is wear I stopped increasing. You should have a circle and it is probably about 8" across. You can keep increasing or not go as wide as I did. This is the base of your basket. Play with it!

I like to variegate the colors...a big of an ombre feel. Usually I will start with two different colors held together and then cut one and tie another color on, carrying the old one along with it, then a few stitches later I will cut the old color and tie the old strand onto a new color...going back and forth so it all kind of blends together. But, this time I left the lavender strand the entire time. I changed only the complimentary color and did not repeat the color at all.

The Sides:


Put the two colors of yarn on the hook in the same way you would normally place one strand on the hook. Hold the strands together, make them into one slip knot and put that on the hook. Crochet with them as if they were one thick strand. Like this:

 You start with the two strands, you come to where you want to change a color. Pick the color you want to change. In this case the purple strand will be continuing and the aqua is going to be to replaced with turquoise. 
 You snip the color that you would like to change (the aqua), you grab the strand of the new color (the turquoise) and hold new and old strands together. 
 Tie them.
Hold this strand with the old strand that is continuing (the purple) and keep crocheting as though they are one strand, crocheting over the tail formed when you tied the turquoise to the aqua. This will keep things neat.

When the time comes to change a color (I change every row or so) just cut a strand and knot the new color right on. I leave a 3 inch tail and crochet over the tail as I work. That way when I snip the ends it is nice and neat.

Still using the N hook. Attach the yarn to any stitch of the base. HDC around, when you come to the end of a row do not slip stitch. Crochet right into the next stitch to form a smooth spiral. I circled around for 6 rows. My basket is just shy of 4 inches tall. But can keep going.

To end this I crochet 3 single crochet stitchs as my last stitchs and then fasten off.

Here is the finished product! Perfect for my pups grooming supplies.


I wear perfume everyday...and so I feel Pickles should, too. The purple spray is Hartz Freshening Spray. It smells so pretty and gives her just a bit of extra luster. I got it at Walmart for about $4. It has lasted quite a while and as you can see I still have lots left. I just hit her with two spritzes during her brushing session. She gets frequent baths, but this is the icing on her morning routine.

I always like to DIY...so I tried a recipe for dog freshening from the internet before buying the Hartz product.

1 Part Listerine (I got the green kind, it smelled the best)
1 Part Cocoa Butter Lotion (for shine, it said)
1 Part Water

Put these in a spray bottle, shake like crazy and spritz on puppies to make them smell better and have a shiny coat. You should have SEEN the expressions on my husband and teenage son when they saw me do this. Sadly they were right. Putting lotion (even watered down) on a dog is not a clean idea. It might just be "my" dogs. But, it was alot like if i spray lotion into my hair. Matted down mess, grease-slick, goopy, dust attracting...eww. And the listerine/cocoa butter scent left LOTS to be desired. Oh, the expressions on the dogs faces after I sprayed them with it was just so sad. I would do it again and snap you a picture. But, I love them too much. 


So, Hartz it is! 

Wednesday, July 25, 2012

Beanie with Headphones Pattern

Hi! Just wanted to share some morning cuteness! I have seen hats with fake headphones everywhere lately and I wanted to make one for a baby I know! I want to share with you guys how I did it. (Click here to go to my Etsy shop if you would rather I make it for you)

Here is the finished product^^ Its my first try. I might do it differently next time. I'll keep you posted.

I used Red Heart Super Saver yarn. I love this color...but this skein had a very crunchy feel to it. The baby recipient has a lot of hair or I would not have chosen this. I think Impeccable yarn would also work well..but Vanna or TLC would be too "floppy". This thing literally stands up, completely formed, on its own when you set it down on a table. Which is just what I want when I am using a hat to add embellishments to. If the hat too floppy you will see where you stitched or glued things on to it once it is washed once or twice. Side Note: Gluing is NEVER as good as stitching. And don't even try glue when you are sending it to someone under five years old. Whatever it is will come off. I LOVE my Liquid Stitch...but I keep it off my baby hats because in the past it has failed the child test. 

Pattern!

Very Basic Ribbed Beanie: 

This is 3-6 month size (16" around, 6" tall) 

You will need to know front post HDC and back post HDC. Both are super simple stitches that I learned on youtube. 

J Hook

Slip stitch, chain one and make first stitch of the next row in the same stitch as chain one (for now gaps) unless otherwise noted. Do not turn. 

Gauge for Hat: 3stitches = 1" wide

In a magic circle, HDC 8 times (8)
Row 2: HDC 2 time in each stitch (16)
Row 3: HDC around increasing in every other stitch (24)
Row 4: HDC around incresing in every third stitch (32)
Row 5: HDC around (32)
Row 6: HDC around increasing in every 4th stitch (40)
Row 7: HDC around increasing in every 5th stitch (48) 3stitches = an inch, so that was 16". Keep going here if you need to :)

Row 8--11: HDC one time in each stitch around (48), (slip stitich, chain 1)
Row 12-14: Back post Half Double Crochet (BPHDC) in same stitch as chain. BPHDC in next stitch, Front Post Half Double Crochet (FPHDC) in third stitch. *BPHDC in next stitch, BPHDC in next stitch, FPHDC in next stitch* and continue *-* all the way around. (slip stitch, chain 1). (48) 

Fasten off. 

Headphone Band:

Change to black yarn. Hold two strands together as you work and still use the J Hook.

Make a chain 28. (hold it up agains the top of the hat...if you made it bigger or smaller just make sure your chain goes almost all the way across the top. This will be forming the band of the headphones. The ends will be hidden so its not necessary to be precise. It needs to be long enough to hit the circles, but not longer than the hat is from one side, across the top, to the other side.)
Then HDC in second chain from the hook and across. 
Fasten off. 

Ear Circles: (Make 2)

Still holding two strands of black yarn together.
Row 1: HDC 9 times in a magic circle. Cinch it up, slip stitch and chain 1
Row 2: HDC 2 times in each stitch around (18) 
Fasten off. 

Assembly:

I sewed the band on with a very wide (basting) stitch to keep it where I wanted it placed on the hat. Then with light grey yarn on a plastic yarn sewing needle I backstitched the circles onto the hat over the band. I just kept my stitch along the edges of the circle. They are very secure. Then once the circles are attached over the ends of this band I cute the wide stitch that was attaching the band along the top of the hat so that the bad would hover over the hat a bit. I thought it was cuter this way. :)

Work in your tails and you are done! Tada!!! 

I think I will need a Melody sized one on a purple beanie before winter come. Maybe a set for the whole family for a little family picture? 


I also made time to color my hair yesterday! I went light a few months ago and was missing my black. So its back!


I love box color <3...Darkest brown all the way. *waves*


Monday, July 23, 2012

Polka Dot Throw

You ever look at something and just say to yourself "I am gonna MAKE you"...gosh, I hope you do, or else this is going to be an awkward moment. Its not just me, is it?

Here is my latest...


It appears to just be plain old Red Heart Super Saver yarn...which I have a few (hundred) skeins of in my stash from hat making. I am going to stick as closely to this color selection as I can. Its so perky! It belongs on my couch.

I hope that you will make one with me! I will update here with my progress. First and foremost...collecting the colors in a basket.

Im off!

Happy Hooking,
Mel

Sunday, July 22, 2012

Review: Bernat Alpaca Natural Blends

Ravelers...please go HERE for the post with the pattern. I messed up and pasted the link to this review where I should have posted the link to the pattern and I cannot seem to fix it. :) 

Well...let me just start by saying, "I love my set of fingerless gloves. But."


I tried Bernats Alpaca Natural Blends yarn. This was an impulse buy and my first time using this yarn. I went with "stone"...a very dark, shiny charcoal gray. Not metallic shiny...it has a sheen to it, as you can see above. It is 70% acrylic and 30% alpaca. It is a nice bulky weight. I paid $6 for my skein.

It is soft. Not as soft as Hooks and Loops Charisma or Lions Homespun, though. If I had it to do over again I would use Charisma. It is the same bulky weight and almost always on sale. So, it would be half the price and a little softer.

All softness aside, there is one reason I am complaining about the alpaca. It sheds EVERYWHERE as I crochet. I have a black cat that lives outdoors (her name is Ninjette, she is AWESOME)...but I kept thinking that she had snuck inside the house. Black hairs were EVERYWHERE. And the hairs that manage to stay on the yarn get very tangled on the hook. It caused the yarn to get very piece-y and separate as I worked. Not a pleasure.

But the end result was the desired one. It was just a hassle getting there. I would give the yarn 2** out of 5*****.

Thanks for reading! Happy hooking <3


Cute and SIMPLE Fingerless Glove Pattern


I took quite the crochet-vacation. Every time I do I come back full of vim and vigor, revving to get back at my hooks. As a starter project, I am making a little something for me. I want to share it with you guys, too! It is a fast, simple crochet project. What I like to call...instant gratification. Like one of those chocolate cake mugs!


Hopefully, this easy to follow video can be of additional help while you are making these gloves.


This pattern goes really fast because it calls for bulky (size 5) weight yarn. Choose something soft and bulky. I like acrylic because it can be washed and dried while maintaining its integrity beautifully. One 3.5 ounce skein of bulky weight yarn. At this weight you should get about 110 yards. 


J/6.00  mm Crochet Hook
3.5oz of Bulky Yarn
Scissors
Yarn Needle

Gauge: 4" x 4" Square is 12 stitches wide and 7 1/2 rows tall.

Glove Uncuffed is 10" long and 4" wide

Note:At the end of each row "chain one loosely and turn" is implied unless told otherwise.

This is for a medium set of gloves. If you want larger then add an additional 2 rows of HDC. I had enough yarn leftover from the 3.5 oz to do this so you should not need to buy more.

Create the Body of your Gloves

Chain 27,
Row 1 HDC in third chain from the hook. HDC in each stitch across (25)
Row 2-15 HDC in each stitch across (25)
Turn your work and single crochet one time into the side of each row (15-19), 

Sew up the sides of your gloves


Fold your work in half, right sides together. 
"Sew" them together with a single crochet in the first 5 stitches. 


(what we do next with form the thumb hole)
Single Crochet in the next five stitches on only one side of the glove (not sewing the two layers together. 
Then proceed to sew the glove together with single crochet stitches in the last 15 stitches
Fasten off. 
Turn the glove right side out. Make a two inch cuff on the bottom of the glove and enjoy!


Repeat the pattern for a second glove.

Let me know if you have any questions?

These are very versatile. They can be adorned with bows, buttons, ribbons...the possibilities are endless. Tag me on social media so that I can see them if you make them.

Thank you for joining me and I hope that you stay warm and joyful. 

Melody


Please remember that you may make and sell items from my patterns...but please give me credit. And never ever sell or reproduce my patterns. Thank you!

This post contains affiliate links. If you choose to follow them you will not pay any extra but I may be financially compensated. I do appreciate your support. Thank you. 


Thursday, July 12, 2012

Starbella Knitting!


Late Night Summertime Sewing

I was up WAY too late last night sewing. Wanted to share my projects!! No patterns, just online tutorials and whimsy. Sometimes I think I should have a separate craft blog called "Pinterest After Dark" *shrugs*

First off, the sewing machine cover. I am really happy with the way it turned out. I won't be remaking it, even though it is not as wide as I would have liked. I measured. I must have lost more inches than I had planned to in the seam allowances.

Its double sided.

Side one is a patchwork striping of blue/purple/green cotton fabric. I used grommets on the sides so that I can cinch it with ribbon.

This is the other side. I love this little sewing notions fabric! Cute colors, the buttery yellow suits my sewing space really well. I put a pleated pocket up front so that it can double as a sewing mat. I will be making a matching thread catcher.


 I am really pleased with it. Despite being thinner than I had imagined, it will do the job of keeping dust off of the machine and prettying up the space.


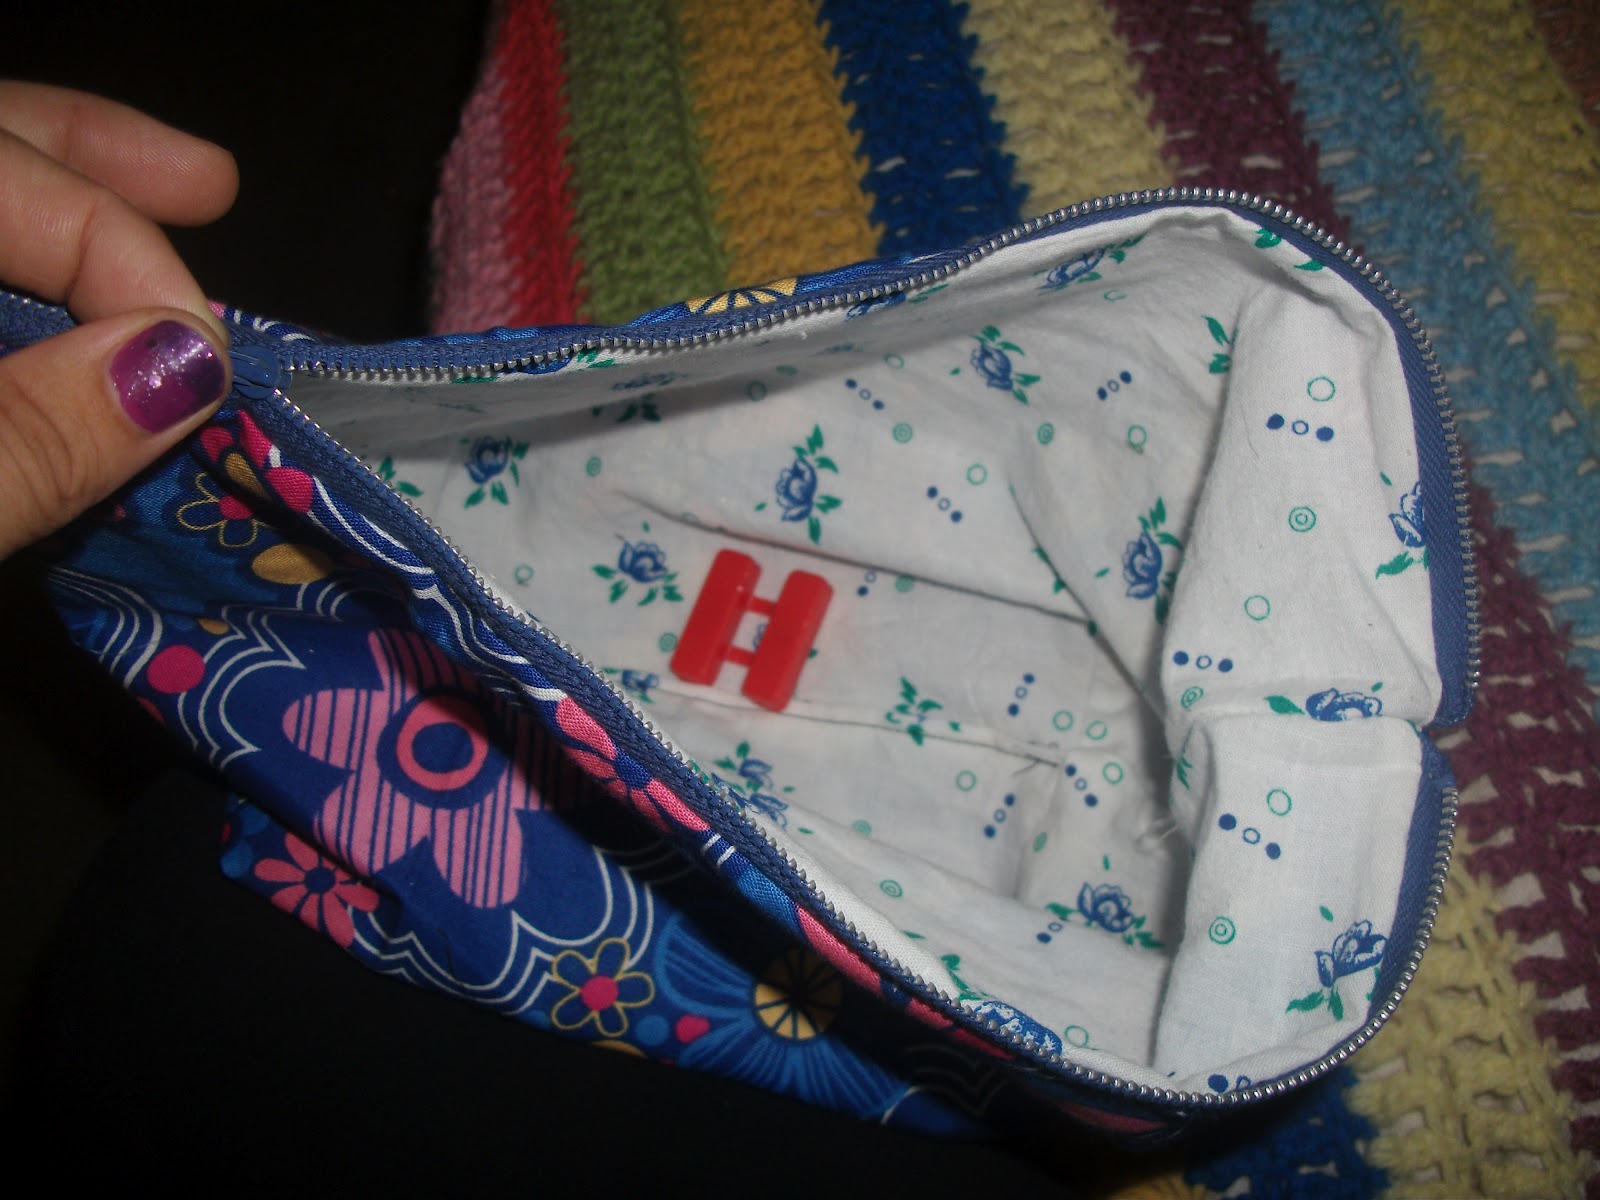
And then I made a bag. But not just any bag. This back is from Noodlehead. Its special for another reason, too. Ill get to that in a minute. This little pouch is about 12" wide. It's got a squared off bottom so I can use it for my makeup and actually see the makeup inside. Pouches can be so irritating to riffle through! But, not these. There will be many, many more in my future. Izzy loved it!


This is why its special. See that on top. Its a ZIPPER. MY FIRST ZIPPER!!!!! *squeal*


 So much procrastination has used, so much elastic has been used....all in the name of not sewing on a zipper. I was intimidated. But, not anymore. I did what everyone told me to. I went slow, I pinned alot...and it was easy.
 So easy that I decided that I needed a skirt with no elastic waist. I used a hummingbird fabric that I bought a while back at Joanns. Its a quilting cotton. I just traced a skirt that I liked, sewed up the sides (minus where the zipper would go). I did a turned hem on the top and bottom edges. Once again, lots of slowness and pinning at zipper time. And its perfect! Fits just right, no bunching, and the zipper has no gaps or mis-sews.

Its hard to tell but the side has a little pocket on it...if you squint just right you can see it right there.
 Front view.
 Pocket and zipper view. Yeah...the pink doesn't match. I love when things don't match. Everything has to match perfectly or has to be a completely different color.
 Then, I used a Pinterest tute on making a thing that Velcros your babies to chairs.

Where were these when my babies were of the age to be Velcro'd to chairs?! This would have been great at grandmas' house when I had a stroller in the living room so that I could take a 15 minute break from chasing them. But, I can let bygones be bygones.

This is for a friend, Joelle, and her brand new baby boy!! I would post a picture of him, but that is rude to do without asking. Lets just say....GORGEOUS!

I used black quilted cotton fabric on the inside and a print that I bought way back that is also made of cotton. They were both "oops fabric" at Joanns. I had enough to make two of these. So, I actually made two of these for $4 + thread and a little velcro...so $5.

 Here it is all laid out. I actually attached the pieces wrong. The bigger piece on the bottom is supposed to connect to the other piece on the shorter side. So it will need to be folded as shown above.

And finally...another dog bow. The pink one. I love the way light pink pops on Pickles black coat. The fabric is glittery and looks great on our walks out in the sunshine. No tutorial. I just winged it. I used scissors to cut 1.5" scallops along a 2" wide strip of fabric. It was the edge of a bolt, so 45" long. Then I ran a wide basting stitch and gathered the fabric. I spiraled the gathered fabric to form the shape of a flower, got it just right and then hand sewed it to keep it in place. Once it was just right I hot glued a button on the front and some double sided Velcro on back. I am  hoping the Velcro will stay on better than the alligator clips have. *fingers crossed*

Well, that't it! After this I noticed that it was 3AM and my husband was getting up for work. So I threw in my new Jillian Michaels DVD (the butt and thighs one AWESOME - 30 minutes and a nice mix of circuits and old school butt exercises), hit the showers and went to bed for a few hours. Now I am off to walk the dog! Happy Thursday!!!

Featured Post

Exploring Local Creativity at the Texas State Fair